 Figure 1 - showing scraped seam on leg
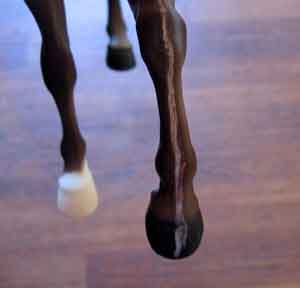
The first thing to consider is the actual model you want to have repainted. Is it an older one with heavy seams to take off, or a newer one with minimal seams? The fewer seams you have to deal with the better. You can certainly prep an older model with heavy seams; it is just going to take you a bit more time.
So, now you have your model, what’s the first thing you do. Take a carbide scraper (available through Rio Rondo and other art supply places) or a sharp knife and “scrape” your seams flat (Fig 1). You can also use hobby files and even emery boards to file the seams down if they are thick.
Figure 1 - showing scraped seam on leg
Once you have your seams pretty much scraped smooth, you can then start sanding. I use sanding sponges as they lend themselves to going around the legs and roundness of models easy. You can get sanding sponges at most hardware places. I prefer the 3M kind as they seem to hold up better to use. Get a variety of “grits” so a “course”, “medium”, “fine” or “extra fine”. On plastic models start with your roughest grit and just lightly sand along all the seam scrapes, use the medium grit on resins as it sands much easier. Next take your medium one (or fine for resins) and again sand over the seam scrape areas. Also give a light sanding to the whole body with this. You don’t need to sand off all the original paint on an OF model, but you do want a smooth body for the primer to adhere to.
You are now ready for your first coat of primer. What color you use can either be determined by the artist painting the model later, or just personal preference, but if it’s your first time prepping, you might try light grey as that will help to “show” you where there are seams or rough spots that still need sanded. I have used both Krylon and Painters touch and either is fine, but you might want to try different kinds and see which one you prefer. The key to any primer is this; shake the can up as it says, for at least 1 minute after the mixing ball is released. The primer must be well mixed for it to work right. Spray on a very light coat of primer and let it dry. Once it’s dry you should be able to pick up your model and look for any seams you might have missed or any rough spots that still need sanding. (Fig.2).
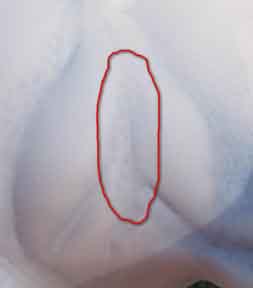 Figure 2 - highlightint area on chest that needs additional attention
At this point you can also consider other things on your model. On OF models molded on tack and copyright stamps can be ground off with a Dremel sanding wheel, just go very slow so you don’t go into the actual body of the model. Then use hobby files or a scraper to take down any extra plastic still left on, and sand in the same steps you used on the body. You can also use a Dremel with its different tips to carve out the ears and hooves if you want to.
You can “draw” the detail to be left with a marker and then grind off the parts you don’t want, just go slow and careful. On resins if you happen to chip an ear tip or mane/tail tip, you can glue them back on with super glue. Just make sure you sand off any glue in the seams. Also if there are pin holes to fill, you can use either a 2 part putty epoxy, or a tiny bit of super glue, just enough to fill the hole, and then a tiny bit of baking soda sprinkled on the area. Both make a resin type material that can be sanded, primed and painted just fine. Just remember to sand it carefully as they will be slightly harder than the surrounding resin. You can use the tiny hobby files for sanding extra material off, just go lightly. On resins just remember to be very careful as resin sands much easier than plastic, so pay close attention to things like added veins and other things you details you don’t want to sand off.
Repeat the sanding and priming in very light coats until the model is all smooth (Fig. 3).
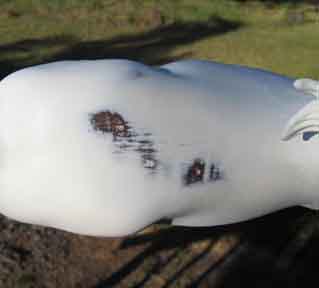 Figure 3 - showing area sanded down that needs another coat of primer
Look for “pimples” on the model that need sanded off. These are dots of primer and occur with any primer, but if not sanded off, they will show up under the finished paint job (Fig. 4).
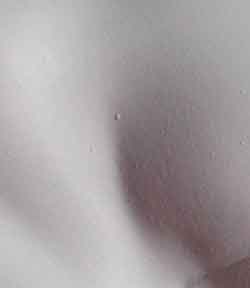 Figure 4 - showing "pimple" on horse
Remember to let the model dry completely between coats of primer. You can use your medium grit sanding sponge for the first few times, and then start using your fine grit. When you think you have it all smooth, give it a very light coat of primer and let dry. It should be totally covered in primer now with nothing showing from underneath.
Take the model into some really good light and examine it closely. If you have everything sanded smooth, then “wet” sand the model with your finest grit sanding sponge. Get the sponge wet and hold the model in the sink and let a bit of water run on it and give a very light sanding all over. You may still need to re-prime areas like ear tips and hoof edges, as sometimes even a light wet sanding will take all the primer off, and this is normal. Once it’s all wet sanded, set it aside to dry. It should feel extremely smooth (Fig. 5).
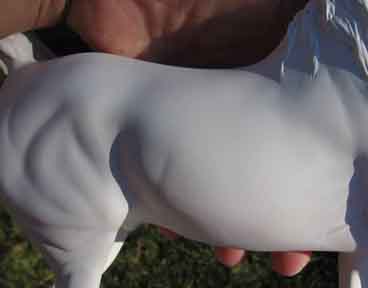 Figure 5 - smooth finish achieved
Your model is now ready to paint. Good luck and happy modeling,
![]() Back up to Library
Back up to Library
![]() Return to the Model Horse Galleries Home Page
Return to the Model Horse Galleries Home Page
This page is maintained by the Model Horse Gallery Curator. ©1996-2020